|
16/9/2017 0 Comments Diy notice board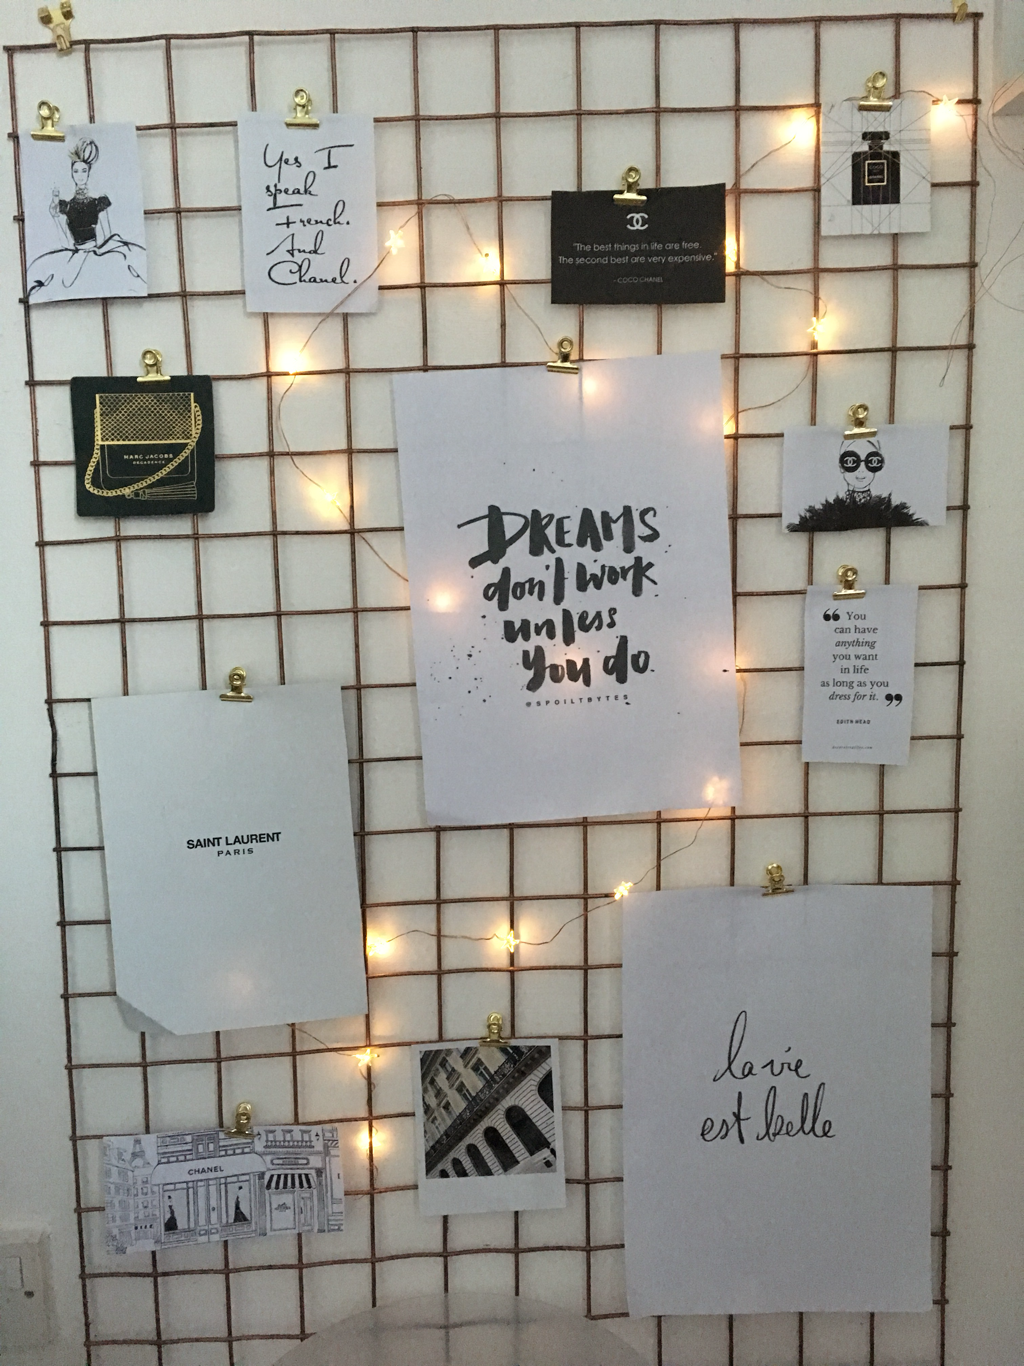 i love creating my own homewear pieces ☆ I find it's often a whole lot cheaper to create the same pieces that are available on the Highstreet, yourself and you can personalise them as much as you like! I've seen these wire notice boards everywhere at the moment from urban outfitters to primark, Pinterest and tumblr. In this post I'll be sharing how I created my own notice board for a fraction of the price ♡ What you will need: •wire panel. Firstly decide what size panel you want. It's very difficult to cut down if you get one that's too big. I got mine from a diy store like B&Q / Homebase. Make sure it's of good quality as it will be the main part of the notice board! • wall hooks & nails • spray paint (I used rose gold) •clear varnish •fairy lights •bulldog clips •prints / photos / clippings etc 1. SPray the panel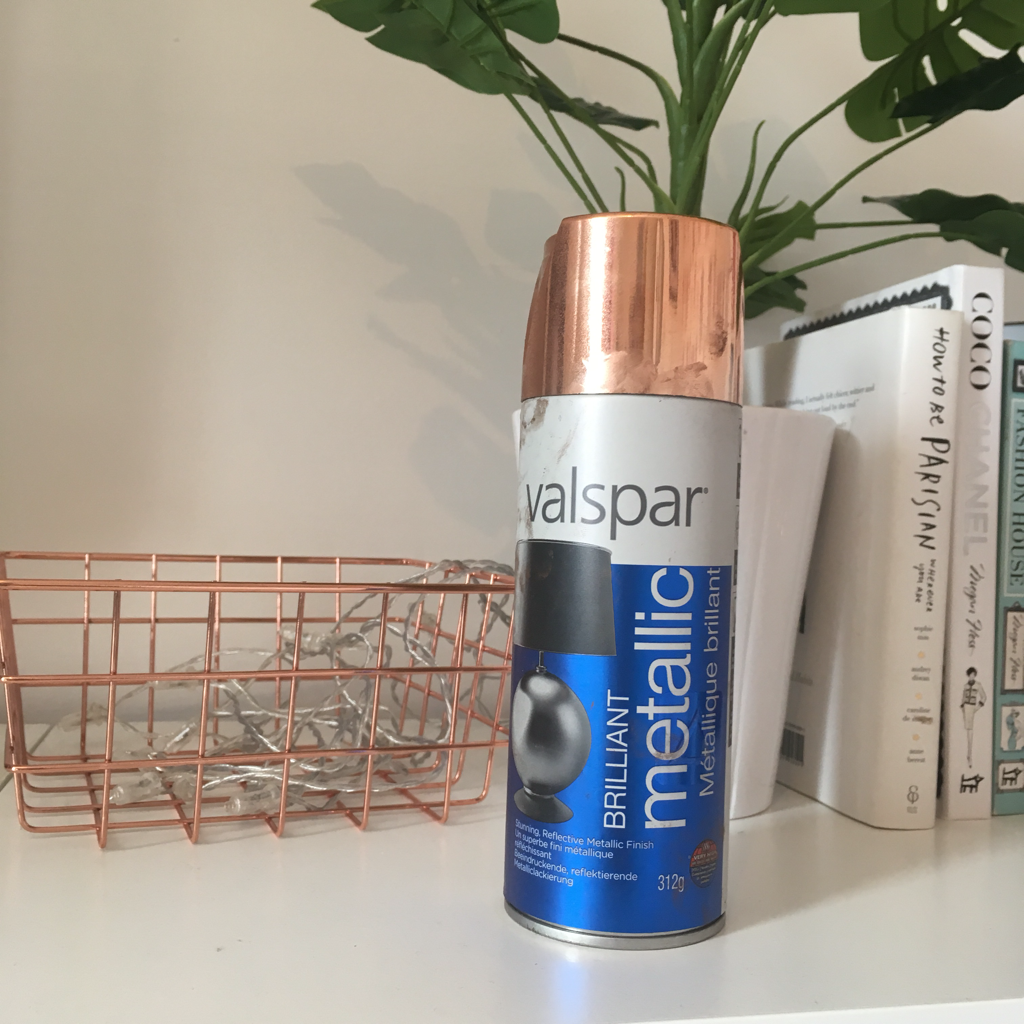 using your spray paint of choice spray your panel. Make sure you get inside all the grooves as the will be visable! It's best to do this outside in a well ventilated area. Allow to completely dry. ☆ 2. Varnish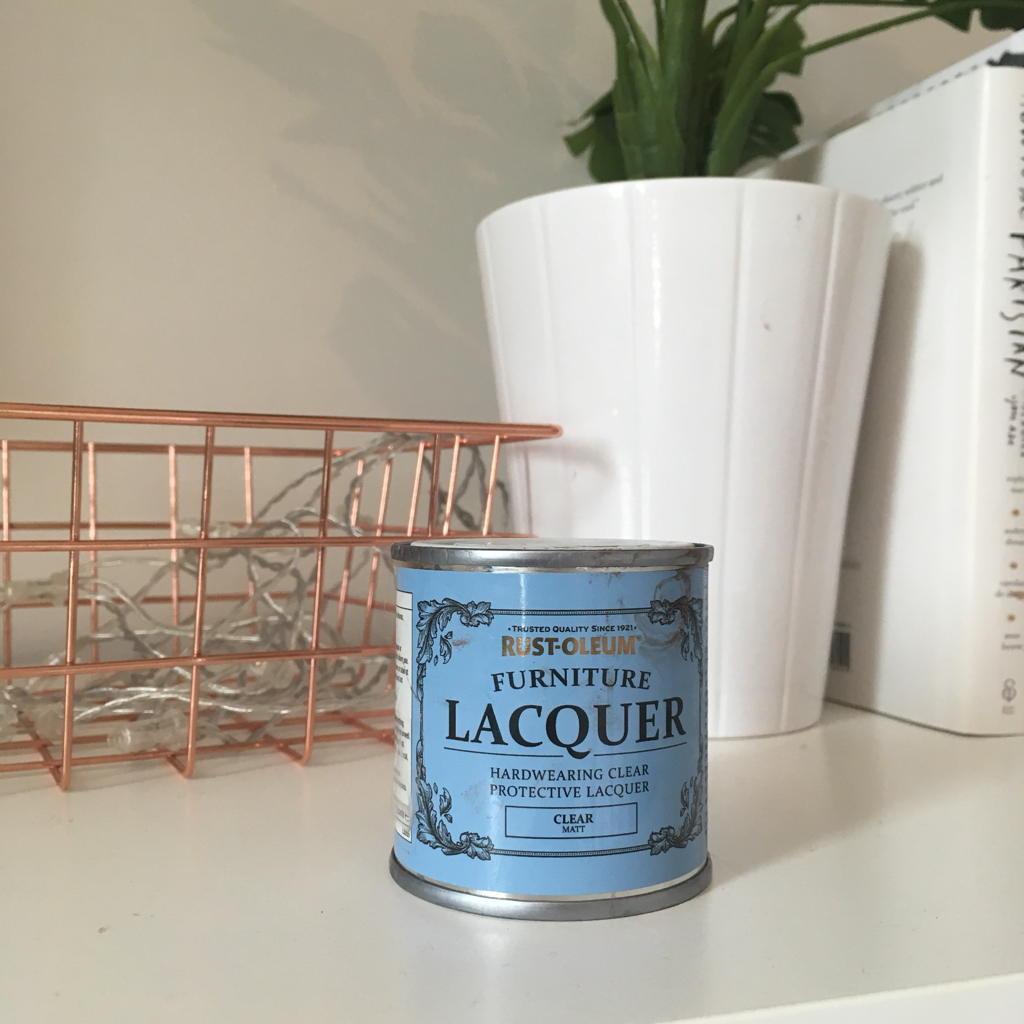 if you have really good quality paint you could miss out this step. However the varnish seals in the colour and prevents any chipping. Again leave to dry before moving onto the next step. ☆ 3. Hang once your panel is dry, hold it up again the wall and mark at the top where you want to hang. Using a spirit level nail into the wall 2 hooks. Make sure they're the correct width apart to support the weight of the frame. Once your happy you can hang your notice board! 4. Thread lights the fairy lights I think work best for this are ones on metal wires / firefly lights. They allow you to bend them easily and twist around the bars of your notice board to keep them in place. It may take a few attempts to get them how you want them but it's worth it. ☆ remeber to either put your board near a plug socket if you have plug in lights, or have a place you can put the battery box for battery operated ones. Collect pictures / photos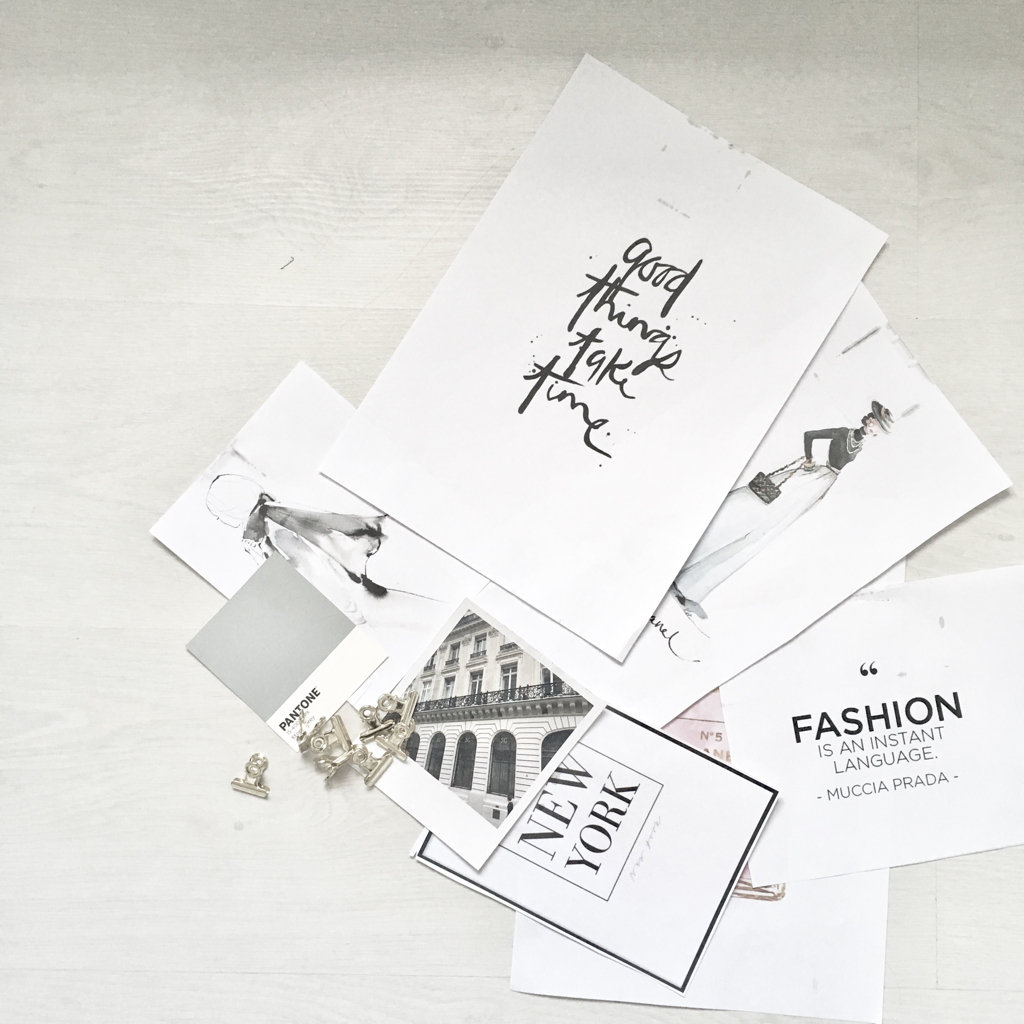  this is the time you can really start personalising your board! Collect pictures/photos, artwork, tickets , postcards - literally anything you want! Use bulldog clips to attach them to your board. A site I totally reccomend for this project is coconut lane. They create the cutest prints that would look stunning in any room. whats more you can get 20% off your whole order with the code 'ZOE20' ! No reason not to buy one of these super sassy prints. https://coconut-lane.com/collections/wall-art 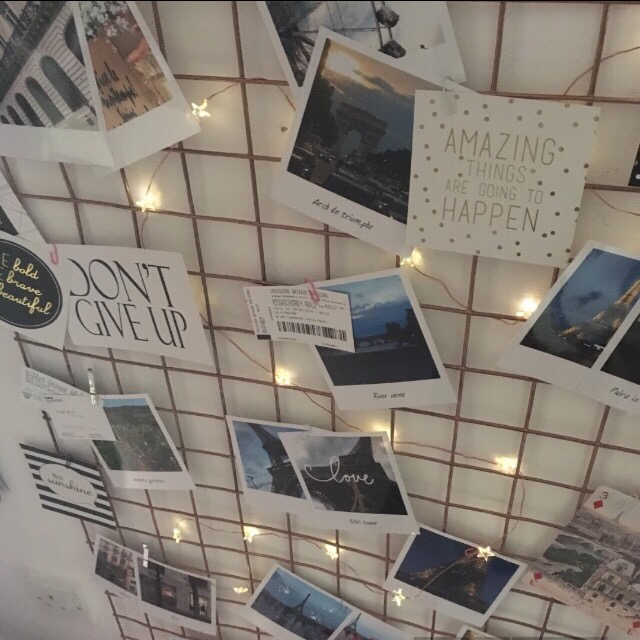 the lovely thing about this DIY is you can continuously add to it, swap and change photos depending on what's happening in your life. It's a great reminder of things you've done and will hopefully bring some happiness to your room. ♡ i hope you enjoyed this DIY. I'd love to hear if you have it a go ♡ Have a good week, Zoë x 
0 Comments
Leave a Reply. |
"A girl should be two things, who and what she wants." Welcome to my blog ♡ I hope you enjoy ,
Zoë x Archives
June 2019
CategoriesAll Beauty Christmas DIYs Fashion Fragrance Hair Care Hauls Lifestyle Mental Health Monthly Favourites Nail Art Reviews Skincare Travel |


 RSS Feed
